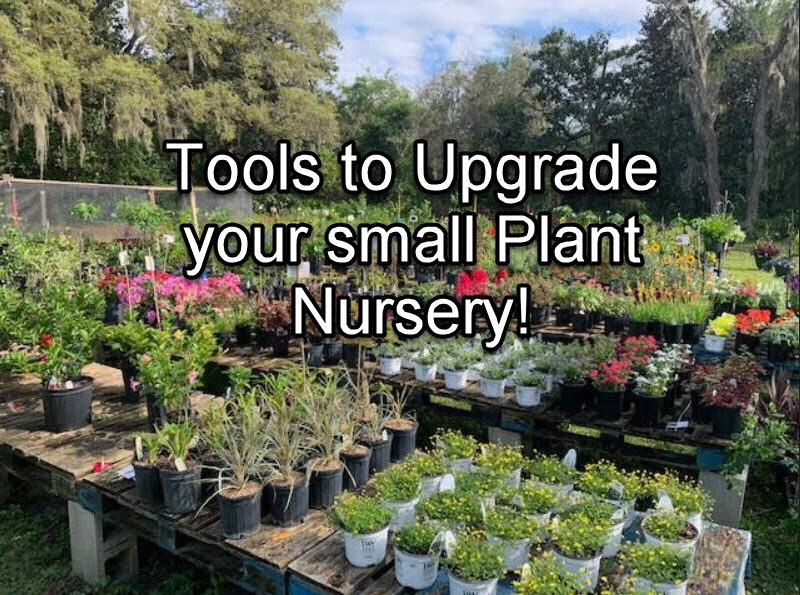
As I promised – I would be sharing our backyard nursery journey for all of you that are following this amazing journey our family embarked on two years ago. We have learned SOOO MUCH. As any business grows you start to look into ways to reduce time spent on tasks. Really anything I can do to make my home life, work life, and this business more efficient- I am down! I wanted to share with you the 5 tools that we upgraded in our first year, and will never look back.
This post may contain affiliate links. For more information, visit my Disclosure page
#1. Plant Tying Machine
This one isn’t number 1 on accident. I am so excited to share this find with you. I am also embarrassed with how long it took for us to discover this beautiful little tool. Tying up your plants is so important to keeping them neat. We have many vines that get super scraggly and start grabbing onto each other (ugh, the time we allowed our Star Jasmine Vines to just grow wild without a trellis still haunts me with all the careful untying). Originally we used plant tie material that came in rolls (we just assumed the rolls were to keep it nice and neat) and cut off what we needed and hand tied them to the trellis. Well a year later some random Facebook video pops up where this guy is using this machine in one step to tie up his plants with the same exact roll we were using but his is in a little staple gun of sorts. Uhhh Well that makes more sense! Haha. We found the Plant Tying Machine on Amazon and purchased it.. Game changer guys. Mexican Flame Vines, Jasmine Vine, even the fast growing stalks that need a tad bit of help! Boom tied up in mins. It still makes me giggle (or cry) to think of the amount of work we put into tying up plants before we got this. The 2nd benefit we get with this gun is using it in our own garden. Being able to so quickly tie up the tomato plants, green peas, and loofah vine to the trellis we have took me just mins. It all looks amazing now. WELL worth the purchase.

There are 3 parts to this tip. Staging is key for your nursery. Whether you have customers directly coming to your residence to shop or if you simply have your plants staged to care for until your next vendor event – you want to reduce the work you are spending on those plants while they sit. A couple of struggles we endured were 1. Weeds/grass growing around where our plants were sitting on the ground. 2. Needing our smaller plants off the ground. And 3. The dreaded wind gusts knocking our taller plants over (eeerrrgg this one was so annoying because of broken branches)
- To reduce the grass/weeds upkeep of the land – we simply laid down weed barrier. Now, don’t go buying some really thin weed blocker thinking you wont be grabbing your weed eater. Buy the stuff that works! This weed barrier that we have doesn’t even let water through it!
- To lift smaller pots off the ground for staging on a budget, we got free pallets from a local food pantry (tons of them) and purchased cinder blocks at our local hardware store. We simply created rows with the pallets using the cinder blocks as legs. They are the perfect height for us and we know when they get old and broken down, we can simply burn them and use the ash for our compost. I sure do love the circle of reusable life in an item.
- The wind knocking our plants over is probably Derricks largest worry. When a tall plant falls over, branches easily break, beautiful flowers fall off, leaves are damaged. It’s just bad for a plant all together as you can imagine and a damaged plant is a loss of money. Well since we cannot control Mother Nature we had to continue to evolve our set up. We started out grouping the plants together to hold each other up. This caused other problems such as the middle plants not getting enough water or light. When we moved to having our setup in rows on a large weed barrier material, we came up with the idea of having wire hold the plants on both sides. It allowed for us to pick the plants up from the middle of the wire, but if wind came through the wire would balance those top heavy plants such as our oleanders, night blooming jasmine, crape myrtle and other trees. Now these are all plants in 3 gallon pots. I bet a 5 gallon pot would take our wire down if the wind was strong enough to push it over. So luckily 3 gallons is our largest size currently. To hold the wire we used engineering stakes (found at your local hardware store) on either end of the row as well as one in the middle for additional stability. When we only did the two on the ends the wire in the middle was too flimsy and wasn’t preventing all falls.


#3. Plant Tag Printer
One of the things I absolutely hate to experience is going to a nursery that doesn’t have plant identification. I don’t love to talk to workers, and really just enjoy looking at plants and doing my own research on light requirements etc. to make sure it is going to fit my project. Without tags- I basically know nothing. So this was definitely a priority for our business. We have changed our approach twice and ended up buying a plant tag printer. Best decision ever. However it is an investment so I want to describe the two other methods we used first, in case that is helpful.
- I have experience in making stickers, so our initial plant tags were simply a blank plastic tag (We bought these waterproof tags) then I would then use my sticker making machine, my Silhouette, to design and cut out pre-sized stickers with each plants name and scientific name on it. I did ensure my stickers were printed on weatherproof sticker paper. I got my paper in bulk from Online Labels. This method looked great and worked great, however it was incredibly time consuming. To design them individually and hand feed them into my cutter machine. It was just too much. So I moved onto the next idea….
- A Dymo label printer was very attractive because it was super fast to type new names and print several labels at a time. Especially when you have a large amount of new inventory coming in. We took the labels and applied them directly to the waterproof tags. The issue that we ran into after a couple of months were the Dymo tags were fading due to the sun. They are thermal labels of course, and we found ourselves having to do rework and replace them. On to the third and final idea…
- An actual tag printer was necessary. This was an investment that we were finally ready to make and we have not had any issues since. The tag printer does 100x more jobs than we even give it credit for or use it for. Our main purpose is to print new tags for each pot coming in so that when a customer takes it, they know exactly what plant it is. We used two different companies to get what we needed for this set up.
- First was Orora Visual where I worked with a sales person to find the best printer for me. I ended up going with the Titan 4 Pro Printer. It has been perfect for our smaller nursery, we print less than 500 tags a month, and we have had it for over a year now with no issues. The salesman were amazing helping me understand how to use it, download the software and even test out my first print!
- Second was Specialty Tag & Label, Inc. whom was able to provide us with the toner and extra tags for the printer. I have used them to buy more of these items as well. Great customer service and fast shipping!
- First was Orora Visual where I worked with a sales person to find the best printer for me. I ended up going with the Titan 4 Pro Printer. It has been perfect for our smaller nursery, we print less than 500 tags a month, and we have had it for over a year now with no issues. The salesman were amazing helping me understand how to use it, download the software and even test out my first print!


#4. Backpack Fogger
When you have plants to maintain, you have bugs. No matter what you do some little friendly bugs are going to make their way onto your plants and wreak havoc in your life! We make a point to use as natural products on our plants as possible which sometimes means you have to use them more often than you would harsh chemicals. Derrick was finding himself spending hours out there spraying our plants with handheld pump sprayers, and even our 3 gallon backpack pump sprayer. It is a lot of work to keep pumping it as well as getting the right amount on the bottoms of the leaves and all other little places needed. This was another time where our creepy phones overheard us complaining about the process and pushed a product to our attention. Although this was a larger investment it was absolutely required in our eyes. We are fortunate to have electricity near our staging area and purchased this fogger which distributes our spray evenly, uses less product, works faster AND no pumping! Derrick doesn’t dread this chore anymore.

#5. Laminator
We have found many uses for a laminator within our business. Not only are we able to create simple signs that withstand the elements for parking and even advising customers to watch their step- we can also laminate signs to go in each of our plant pots telling customers what the plant is, the sun requirements, a picture, and some quick facts about it. These are easy to create as new inventory comes in. I just print them out on regular paper, cut them out, and then laminate them. We leave these in the pots throughout the season and only replace them when the well water starts to discolor them or the sun fades the print. There are many affordable laminator options out there- but the coolest super affordable one in my opinion is this one with the cutter on top!

I hope you find some of these tools beneficial! If you have found other tools that have been very helpful to starting up your nursery business, feel free to drop the info in the comments for others to see! Happy Planting!
Enjoyed this read? Check out these related blog posts:
Official Nursery Status
Backstory of Propagate Happiness
The backstory of Propagate Happiness & Business Update: 2021 - Propagate Happiness
[…] this read? Check out these related blog posts:Top 5 Tools Needed for your Start Up NurseryOfficial Nursery […]